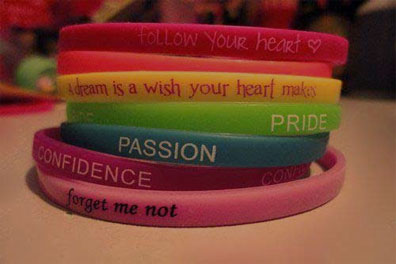
Are you planning a corporate party, an event, your child’s birthday party, awareness campaign or a promotional event? If yes, then you must consider bringing the custom wristbands into use. These bands are the most effective item to bring your event into the limelight, regardless what your event is all about. With their attractive looks and appealing messages, these bands are going to catch the attention of many. So, no matter what your event is all about; make you own rubber bracelets with WristbandBuddy and get them in the number you want.
Designing your own custom bracelets has not been so easy. You just need to specify your requirements and you will get the final product designed in the way you have thought of. WristbandBuddy provides you the simplest way for customizing rubber bracelets according to your specific needs. You need to make a choice among so many available options, like for colors, styles, size, font and more, step by step and this selection will be used while production. Here we are going to mention the steps that you would be required to follow for designing your personalized wristbands.
1. In the first step, you will be asked to select the thickness of the bands. You can choose among four options to specify that how thick you want the bands to be. The available options are 1/4 inch, 1/2 inch, 3/4 inch and 1 inch. So, depending on your choice and requirements, you can choose any thickness.
2. In the second step, you would be asked to choose a particular design among the four available options which are ink-filled, embossed, debossed and screen printed. Depending on the audience and on the kind of event you are going to use these wristbands for, you can make a right choice for bracelet style.
3. The third step is for choosing the color style. In “solid” design, the entire band will be of single color; in “segmented”, the different segments of the band will be colored with different colors; in “swirled”, the bracelets will be of two colors without any particular design and in “glow in the dark”, the band will possess the color that will shine in the dark. You can select any color style according to your requirements.
4. In the next step, you will be asked to choose a color for your custom bracelet. There is a wide range of colors to choose from.
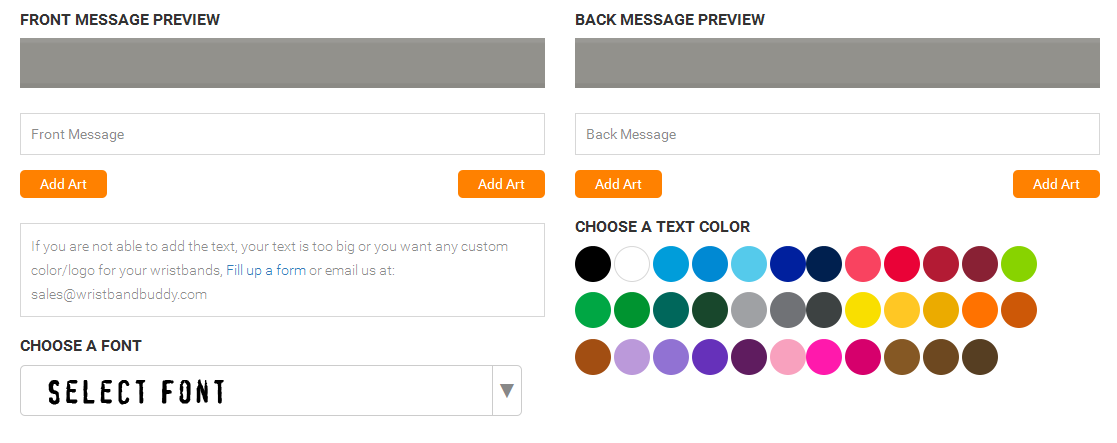
5. After that, you can mention the message that you want to get printed on your wristbands. You need to mention the desired front and back message preview. Other things that you need to choose is the message color and the font.
6. Next step is about specifying the quantity (as much you want) and the size (extra-small, small, medium, large, extra-large). In the case you have any special instruction for the bands then you can mention them in the text box labeled as “Special Instructions”.
7. In the case you want your bracelets to be individually packed, filled with glitters or designed as a band keychain, then you can make a selection in this step.
8. Lastly, it is about shipping. Standard shipping is free, but you will be required to pay $50 for rush production.
Start Designing Your Own Bracelets
Undoubtedly, the steps to make your own rubber bracelet are simple; you just need to be clear that what you are looking for. It will let you make a perfect selection.